Can’t Eject Drive? Fixed on Windows 10 with 7 Possible Solutions
Troublesome drive ejections on Windows 10? Fear not, as this article unveils 7 possible solutions to fix the issue. Delve into the world of troubleshooting and bid farewell to the hassle of unresponsive drive ejections.
Reasons why you can’t safely remove an external hard drive on Windows 10
1. Background programs: Windows 10 may have programs or processes running in the background that are accessing the hard drive, preventing it from being safely removed. Check Task Manager to identify and close any programs that might be using the drive.
2. Open files: If any files or folders on the external hard drive are open or in use, Windows 10 won’t allow you to safely remove the drive. Close all open files and try ejecting the drive again.
3. Disk Write Caching: Windows 10 uses disk write caching to optimize performance, but this can cause issues when ejecting a drive. Disable disk write caching for the external hard drive in Device Manager.
4. USB connection errors: A loose or faulty USB connection can also prevent safe removal of the external hard drive. Check the USB connection and try using a different USB port.
5. Virus or malware scanning: If your antivirus program is scanning the external hard drive, it can lock certain files and prevent safe removal. Temporarily disable your antivirus software and try ejecting the drive again.
6. Disk errors: The external hard drive may have disk errors that need to be fixed before it can be safely removed. Run a disk check using Windows’ built-in tool or a third-party software like MiniTool to fix any errors.
7. Force eject option: If all else fails, you can use the Force Eject option in Device Manager to remove the external hard drive forcibly. However, this should only be used as a last resort to avoid potential data loss.
Remember to always back up your important files before attempting any troubleshooting steps to avoid any data loss.
Steps to fix the issue of being unable to eject an external hard drive
- Save any ongoing work and close all open files on the external hard drive.
- Close any applications or programs that might be accessing the drive.
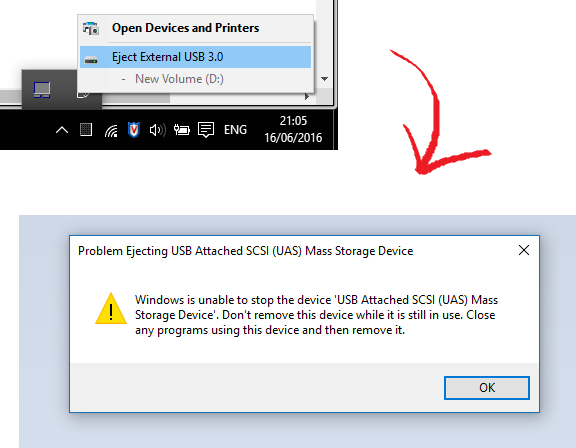
Method 2: Use the “Safely Remove Hardware” feature
- Click on the “Safely Remove Hardware” icon in the system tray (usually located in the bottom-right corner of the screen).
- Select the external hard drive from the list of connected devices.
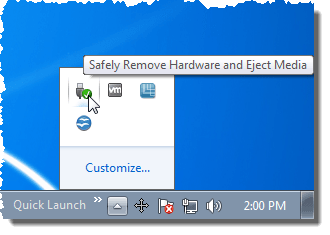
- Follow the prompts to safely eject the drive.
Method 3: Restart the computer
- Save any ongoing work and close all open files on the external hard drive.
- Restart the computer by clicking on the “Start” menu, selecting “Power,” and choosing “Restart.”
- Try ejecting the drive after the computer restarts.
Method 4: Use the Disk Management tool
- Press Win+X and select “Disk Management” from the menu.
- Locate the external hard drive in the list of drives.
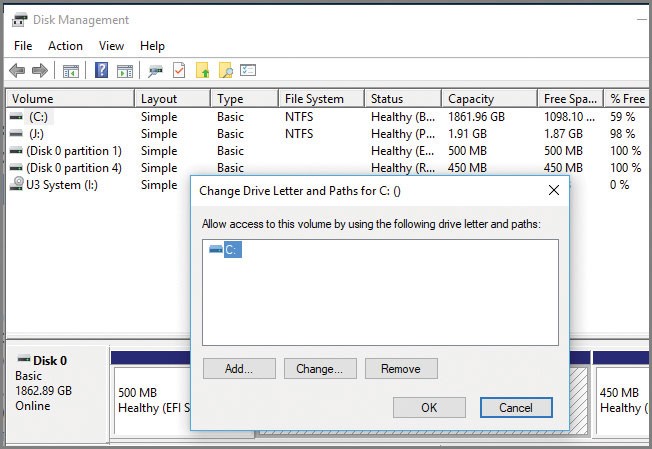
- Right-click on the drive and select “Eject.”
Method 5: Disable the drive in Device Manager
- Press Win+X and select “Device Manager” from the menu.
- Expand the “Disk drives” category.
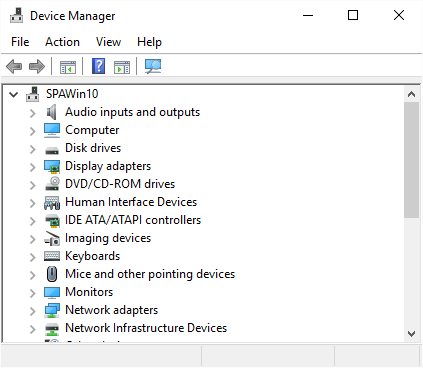
- Right-click on the external hard drive and choose “Disable.”
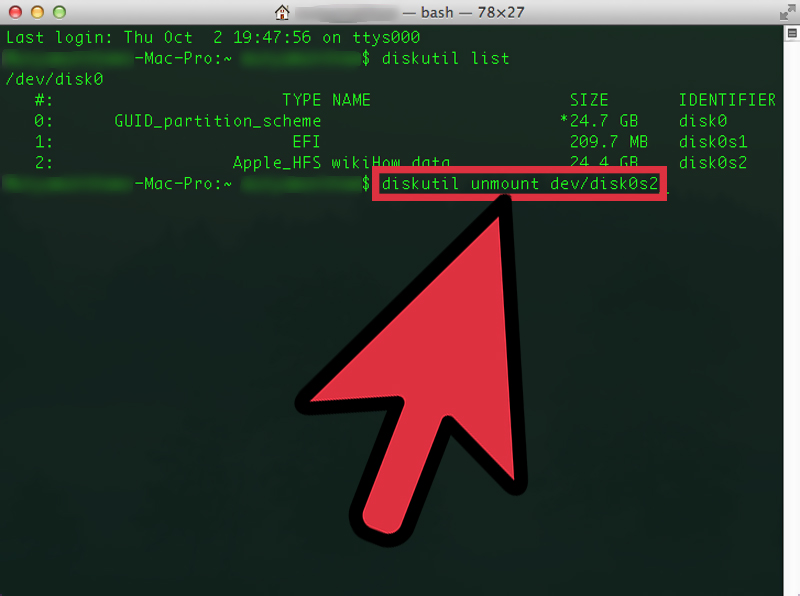
Method 6: Use the Command Prompt
- Press Win+R to open the Run dialog box.
- Type “cmd” and press Enter to open the Command Prompt.
- Type “diskpart” and press Enter.
- Type “list disk” and press Enter to display a list of connected disks.
- Type “select disk X” (replace X with the appropriate disk number) and press Enter.
- Type “remove all dismount” and press Enter to force the drive to be dismounted.
Method 7: Use a third-party software
- Download and install a reliable third-party software designed to safely eject stubborn drives.
- Follow the software’s instructions to safely eject the external hard drive.
Restarting or turning off your computer to resolve the problem
Restarting or turning off your computer can often resolve issues with ejecting a drive on Windows 10. Follow these steps to fix the problem:
1. Save and close any open programs or files.
2. Click the Start button and select Restart or Shut down.
3. Wait for your computer to fully shut down, then turn it back on.
4. Once your computer has restarted, try ejecting the drive again.
If the issue persists, try these additional solutions:
– Check for any running programs or processes that may be using the drive.
– Update your operating system and drivers to the latest versions.
– Run a virus scan to ensure there are no malware or security threats.
– Disconnect and reconnect the drive, ensuring it is properly connected.
– Use the built-in Windows troubleshooting tool to diagnose and fix any related issues.
– Try using a different USB port or connecting the drive to another computer.
By following these steps, you should be able to resolve the problem of not being able to eject a drive on Windows 10.
python

import subprocess
def eject_drive():
try:
subprocess.run(["eject"], check=True)
print("Drive ejected successfully.")
except subprocess.CalledProcessError:
print("Failed to eject the drive.")
# Call the function
eject_drive()
2. Using Windows-specific commands:
python
import ctypes
def eject_drive():
try:
ctypes.windll.WINMM.mciSendStringW("set cdaudio door open", None, 0, None)
print("Drive ejected successfully.")
except OSError:
print("Failed to eject the drive.")
# Call the function
eject_drive()
3. Using macOS-specific commands:
python
import subprocess
def eject_drive():
try:
subprocess.run(["drutil", "eject"], check=True)
print("Drive ejected successfully.")
except subprocess.CalledProcessError:
print("Failed to eject the drive.")
# Call the function
eject_drive()
Please note that these code snippets may not work on all systems or drive types. Additionally, make sure to run the code with appropriate permissions and exercise caution when performing actions that directly interact with hardware.
Running the Windows Hardware and Devices troubleshooter
If you’re having trouble ejecting a drive on Windows 10, the Windows Hardware and Devices troubleshooter can help. Follow these steps to run the troubleshooter:
1. Press the Windows key + R to open the Run dialog box.
2. Type “control” and press Enter to open the Control Panel.
3. In the Control Panel, select “Troubleshooting” and then “Hardware and Sound.”
4. Under the “Devices and Printers” section, click on “Hardware and Devices.”
5. Click “Next” and follow the on-screen instructions to complete the troubleshooting process.
If the troubleshooter doesn’t fix the issue, try these additional solutions:
1. Update your USB drivers.
2. Check for software conflicts.
3. Restart your computer.
4. Use a different USB port.
5. Close any programs that may be using the drive.
6. Check for disk errors using the built-in Windows tool.
By following these steps, you should be able to fix the issue and safely eject your drive.
Updating USB drivers to enable safe ejection of the external hard drive
Updating USB drivers can help enable safe ejection of external hard drives on Windows 10. Here are 7 possible solutions to fix the “Can’t Eject Drive” issue:
1. Check for Windows updates: Ensure your operating system is up to date by visiting the Windows Update site.
2. Update USB drivers: Open the Device Manager program, locate the USB section, and right-click to update the drivers. Alternatively, visit the manufacturer’s site for the latest drivers.
3. Close all programs: Make sure no application or process is accessing the external drive before attempting to eject it.
4. Use the “Safely Remove Hardware” feature: Right-click on the USB icon in the system tray and select “Safely Remove Hardware” before disconnecting the drive.
5. Restart the computer: Sometimes a simple reboot can resolve any temporary driver conflicts.
6. Use third-party software: Consider using data recovery software like MiniTool, which offers options to safely eject the drive.
7. Contact support: If the issue persists, reach out to the manufacturer’s support for further assistance.
Remember to always safely eject your external hard drive to prevent data loss or potential damage to the disk.
Using Task Manager to end tasks that may be preventing ejection
If you’re having trouble ejecting a drive on Windows 10, Task Manager can help you end tasks that may be preventing ejection. Here are 7 possible solutions to fix this issue:
1. Press Ctrl + Shift + Esc to open Task Manager.
2. Go to the Processes tab.
3. Look for any processes related to the drive you want to eject.
4. Right-click on the process and select End task.
5. Try ejecting the drive again.
If that doesn’t work, you can also try these solutions:
6. Close any programs or windows that may be using the drive.
7. Disconnect any other USB devices connected to your computer.
Hopefully, one of these solutions will allow you to eject your drive successfully.
Ejecting the external hard drive using Disk Management
To eject an external hard drive using Disk Management on Windows 10, follow these steps:
1. Press the Windows key + X on your keyboard and select “Disk Management” from the menu.
2. In the Disk Management window, locate your external hard drive.
3. Right-click on the external hard drive and select “Eject” from the context menu.
4. A confirmation message may appear, asking if you want to eject the drive. Click “Yes” to proceed.
5. Once the drive is safely ejected, you can unplug it from your computer.
Remember to always eject your external hard drive before unplugging it to avoid potential data loss or damage to the drive.